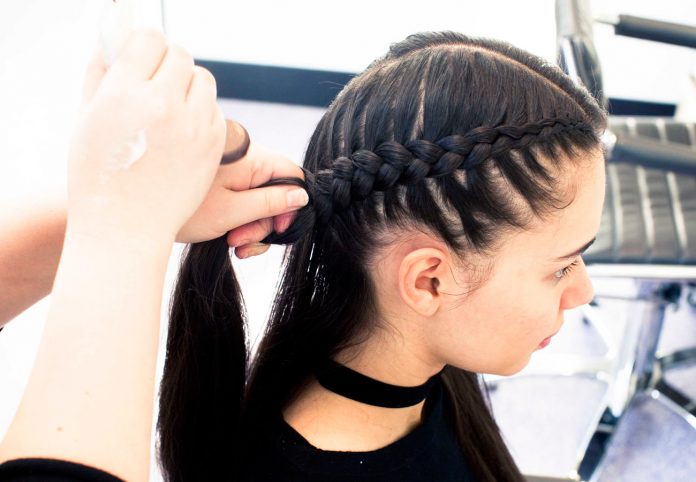
Braids are in vogue now. With Tinseltown’s finest sporting all sorts of braids, the glamour quotient of the simple braid sure has gone up. Following up the simple braid is the french braid whose immediate successor would be the inverted kind. Though braids look next to impossible to manage, there’s always the underlying technology which is Oh So Simple to master. In this article, we described regarding Inverted French Braid.
Table of Contents
Restyling hair! Try the Inverted French Braid
What’s an inverted french braid you ask? Well, it’s exactly what you get from its name, a french braid that’s well, inverted. Simple? Hmm… that’s up to you to decide. If you’re familiar with the normal french braid, then this one’s just as easy. If not, however, you might just need some practice. A regular french braid looks to rest on your head, the reverse braid appears to sit on the top of your head. So, instead of weaving the outer sections of the hair over the middle section, we weave under the middle section, thereby causing an initial elevation. This elevation is essentially what could give rise to the faux hawk.
So how is it done? Follow these steps.
 1. Begin at the hairline.
French braid enthusiasts, you know the drill. Begin by gathering a top section of your hair, divide it into three equal sections. Begin braiding how you normally would, with one small exception. The two outside sections will always move under the middle section as opposed to the other way around when dealing with a normal braid. This step might be a little confusing if you’re familiar with the normal french braid.
2. Add more hair.
Once you’re done with the first step of the braid, scoop up a little more hair and incorporate it with the next section of hair. In other words, gather some hair for each of the sections, a little for the left, right and middle. What you’re left with, essentially, is thicker strands of the initial three sections you began this step with.
3. Repeat
Now all you have to do is repeat the process on the opposite side.
4. Keep Braiding
Keep it moving and continue braiding incorporating hair from either side to the sections that are being intertwined. Pay attention to the fact that you’re moving the outer sections beneath the middle section always. If you forget this simple fact, you’ll end up with a half French, half inverted braid! Trust me, it ain’t pretty. If a thinner braid is what you’re looking for, grab smaller sections of your hair to incorporate. Thicker ones would entail a thicker braid.
5. Finish Up the Ends.
Once you’ve reached the nape of your neck, depending on the length of your hair, pull the braid to one side and continue braiding. Tie off the ends when you’re satisfied with the amount of unbraided hair left.
And there you have it, your Reverse French braid all ready for you. Taming wet hair can be a pain, especially if you’re running out of time, but have to look your finest. That’s where braids come in, keeping hair off your face, but still contributing to that chic look. For a cute summer look, opt for braids as they not only leave you feeling cooler but also looking fabulous. The best part of braids is that you can add all sorts of accessories to it, right from pretty clips, beads, ribbons, headbands and so on.

